
Did you know that our ballet pump pattern is completely FREE to download 🤔 You can find it here: https://icanmakeshoes.com/collections/patterns/products/shoe-pattern-ballet-pump
We believe that the ballet pump is one of the best places to start for beginners, and it doesn’t hurt that they are totally in style at the moment too 😉
You’ll learn so much about the shoemaking process from making a simple shoe like this, which is why we wanted to make this pattern free, in an effort to make shoemaking a more accessible craft for all 🥿
As a little extra help, I decided to film a tutorial on how to use this pattern to create a ballet flat upper!
Here's a little run through of how to make these ballet pump uppers from our free ballet pump pattern:

Step 1: First, you need to piece together your pattern. We wanted this pattern to be printable at home so it is designed to fit onto pieces of A4 paper and then taped together.
Step 2: Then use this pattern to trace out both your uppers and your linings. Remember to flip the pattern so that you get left and right feet!

Step 3: Cut out your two uppers and two linings.
Step 4: Then glue together the back seams of all the pieces with water-based glue. You will want to glue right side of the leather to right side of the leather. This glue is just to hold the pieces in place whilst you stitch so doesn't need to be a massively strong hold.

Step 5: Then stitch together the back seam of each upper and each lining. You will want to stitch all of these pieces inside out. The sewing machine that we use here at I Can Make Shoes is the Janome HD9.
Step 6: Then place some glue along the stitch line and open the seam.
Step 7: (Optional) Use a safety beveler to take some of the weight out of the seam on each upper and each lining. This will make the back of the shoe less bulky when the lining is attached.
Step 8: Next, use your pattern to mark the folding allowance onto your uppers. Then place a spatula width of glue over this line and fold your topline.

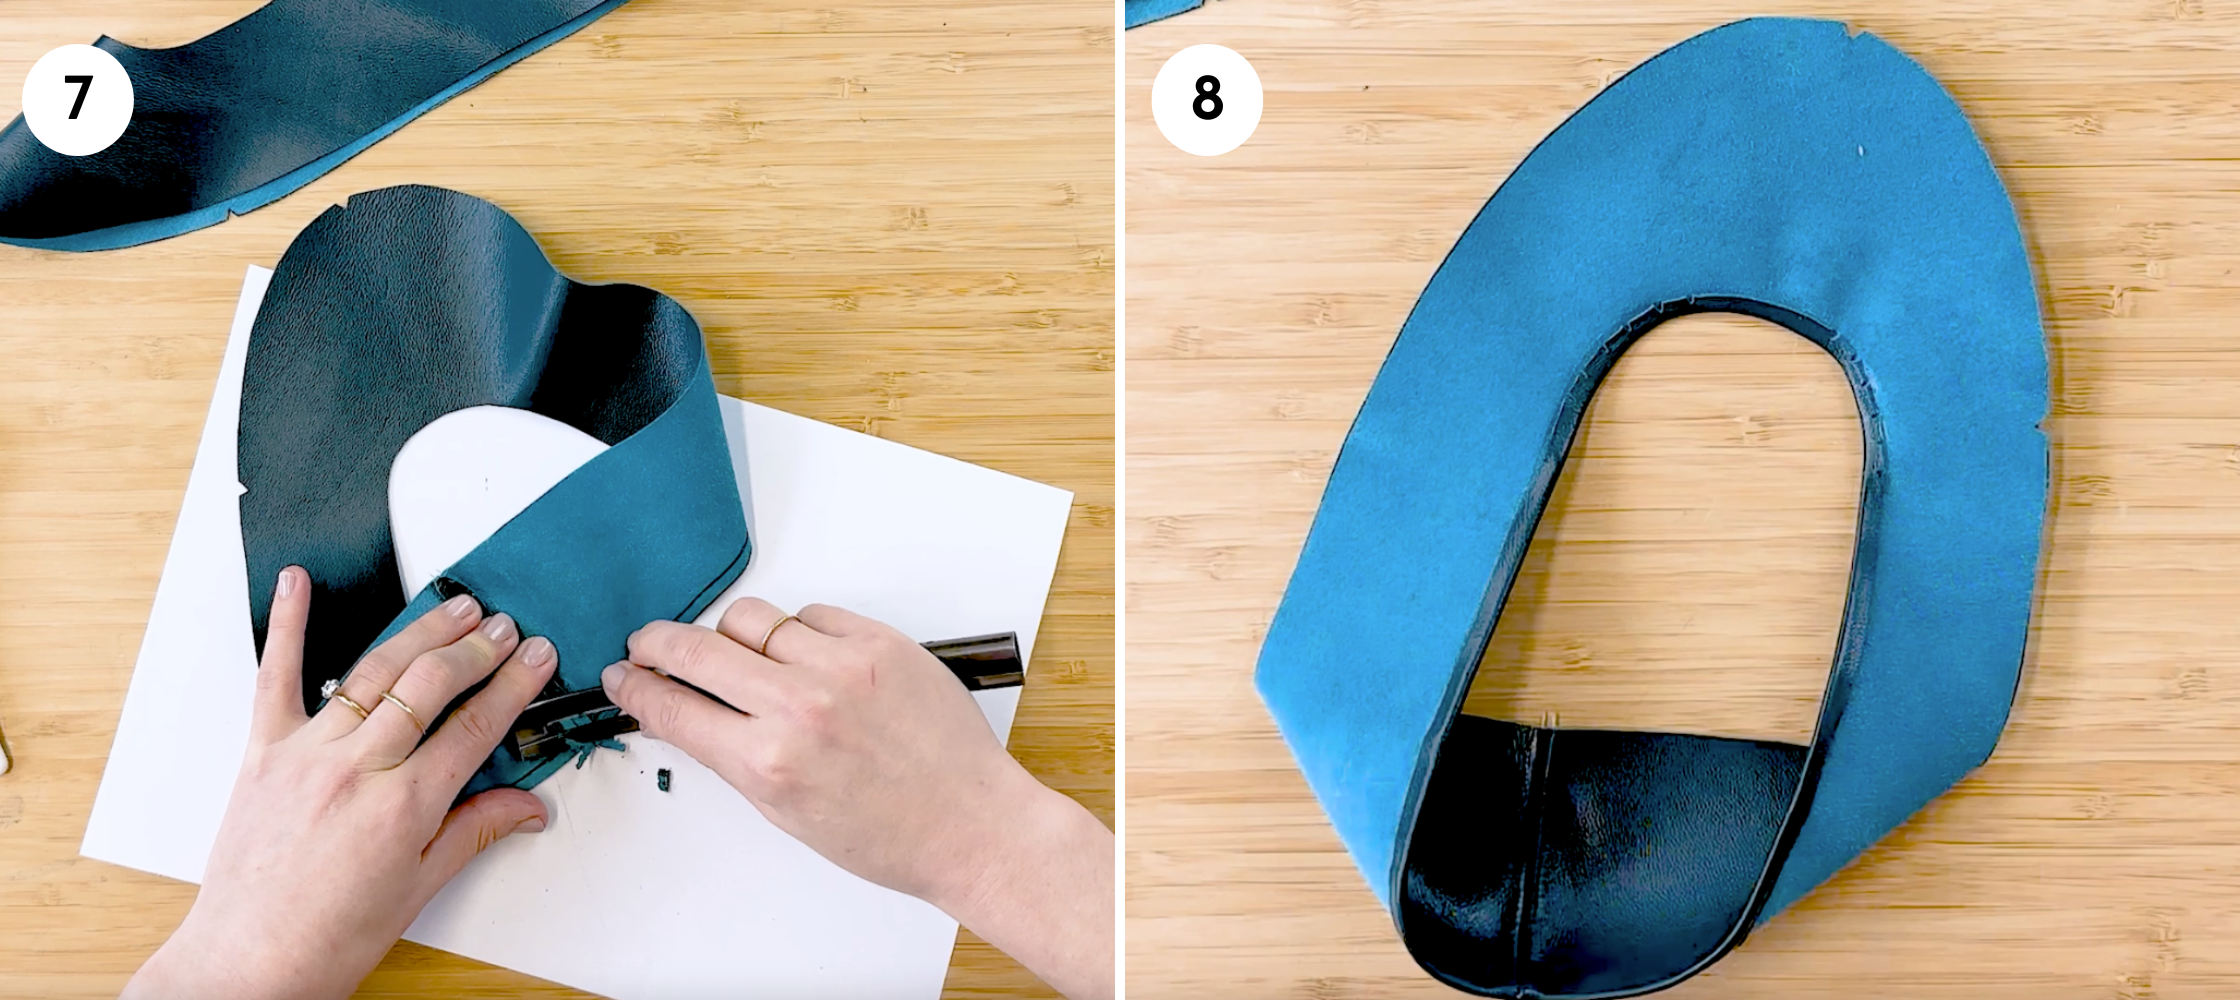
Step 9: Place a thin strip of glue around the topline of the upper and 5mm down from the edge of the lining. Then attach the lining and the upper together wrong side to wrong side (so that the right side of the upper is facing out and the right side of the lining is facing the inside of the shoe).
Step 10: Stitch the upper and the lining together as close to the edge as possible. Make sure to remember the trimming allowance on the lining. If in doubt, always match up your notches. Your notches don't need to be perfectly aligned but should be quite close.

Step 11: Trim off your trimming allowance. I like to leave a little bit of the trimming allowance at the back of the shoe as this helps when it comes to lasting the shoes.
Step 12: There you have your finished upper! Now it is ready to be lasted.
To continue making your ballet pumps, grab our eBook or join an Online Course!
Here's what you'll need to make your own Ballet Pumps:
1. Our FREE ballet pump pattern
2. A pair of Flat Shoemaking Lasts
5. Pre-made soles - I find these give the most clean and finished product!
6. Foam Sheets for added comfort for the insoles
(7. Texon Board for the insoles if you choose not to use our pre-made flat soles and insoles)
(8. Resin Soling for the soles if you choose not to use our pre-made soles)
9. A Sewing Machine - we use the Janome HD9
If you need all the tools, equipment and components - you can purchase our Ultimate Shoemaking Starter Kit which comes with a pair of lasts, a Shoemaking Tool Kit and a Component Kit. Then all you need to do is add leather! This kit is a great way to step into the shoemaking world and you'll be able to use many of the tools for multiple shoemaking projects!
If you want all the materials and components for ONLY a pair of ballet pumps, you can purchase our Ballet Pump Shoemaking Kit. You'll just need to add a few of your own tools. This kit also comes with a full step-by-step video tutorial.
You can find additional shoemaking supplies here and in our supply shop.


